Introduction
Webcams are fine for everyday video calls — but if you want to stand out with razor-sharp clarity, creamy background blur, and professional quality, nothing beats using your DSLR as a webcam. The good news? It’s easier than you think. With just a few steps, you can transform your camera into the ultimate streaming or conferencing tool. Here’s everything you need to know to make it happen.
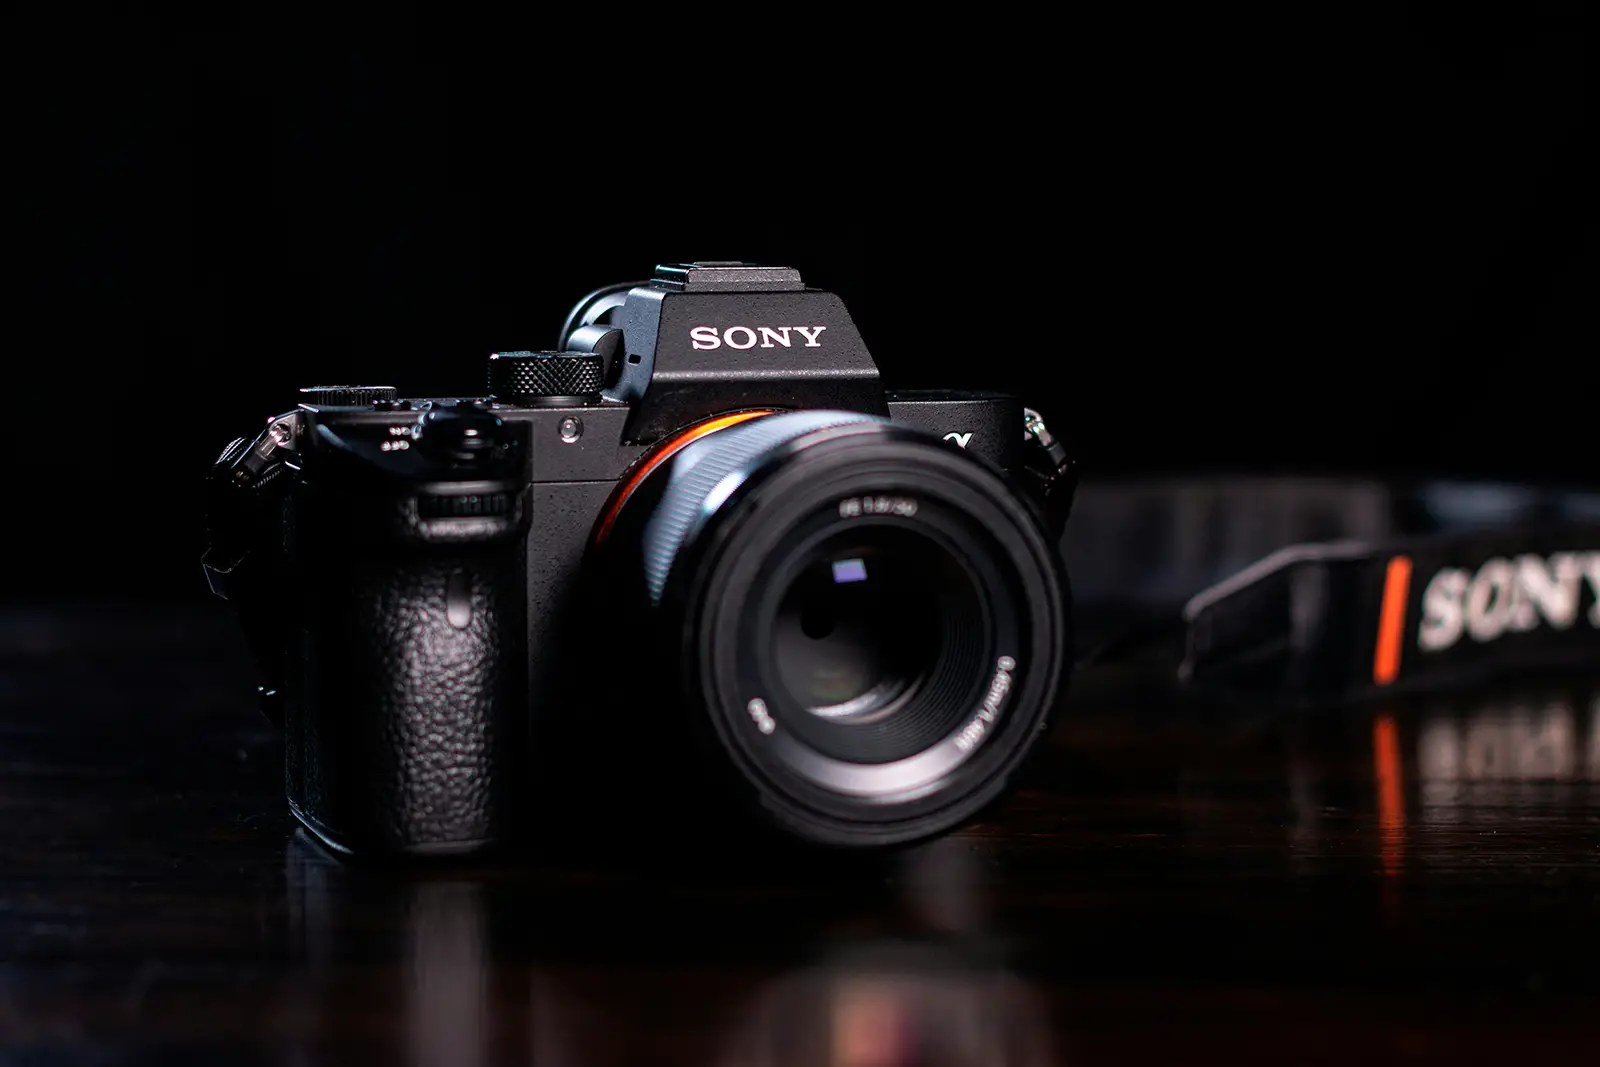
Sony DSLR Camera
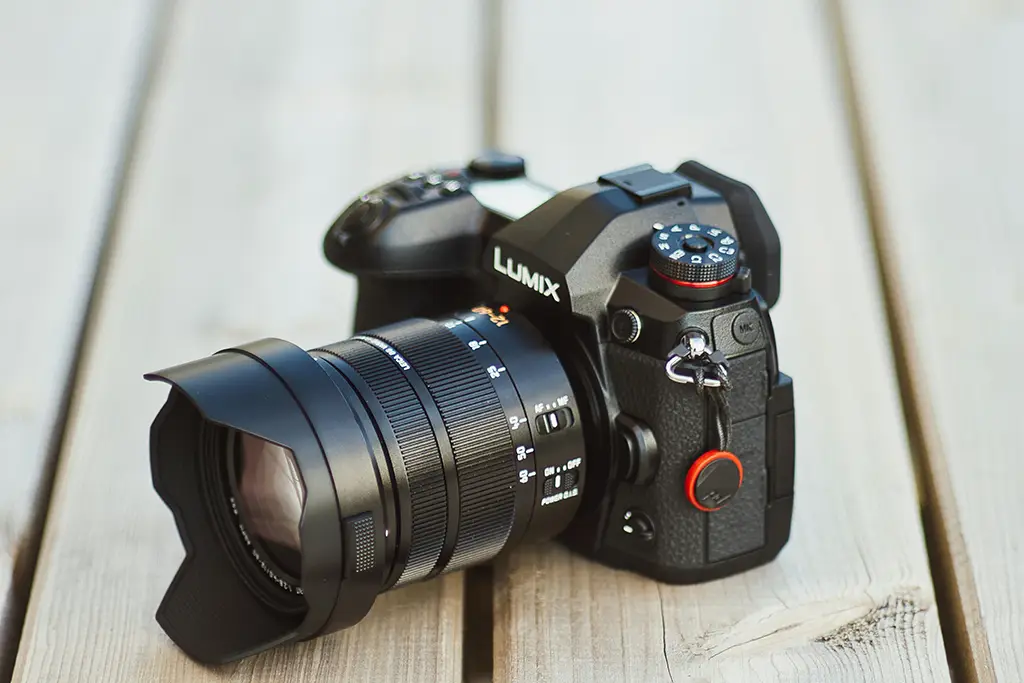
Why Use a DSLR as a Webcam?
- Unmatched Quality: Bigger sensors = better image. Your video will look cinematic compared to grainy built-in webcams.
- Lens Flexibility: Choose a lens that flatters you — wide for group calls, prime lenses for a gorgeous, blurred background.
- Professional Edge: Perfect for online meetings, live streaming, teaching, or virtual events.
What You’ll Need
Before diving in, gather a few essentials:
- Your DSLR or Mirrorless Camera
- USB Cable or HDMI Capture Card (depending on your setup)
- Power Source (a dummy battery or continuous power adapter is a lifesaver)
- Tripod or Stable Mount
- Webcam Utility Software (most camera brands offer this for free)
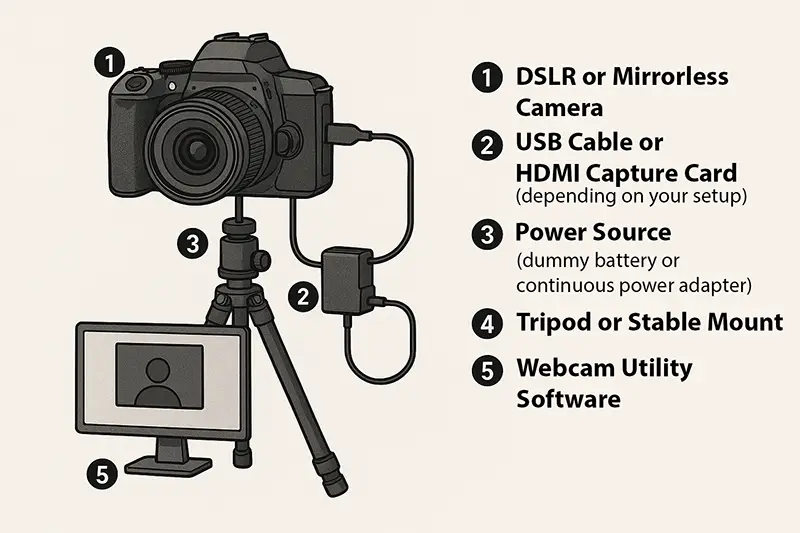
What Equipment You’ll Need.
Step 1: Install Webcam Software
Check your camera brand’s website — Canon, Nikon, Sony, Fujifilm, and Panasonic all offer free webcam utilities. Download and install the one designed for your model.
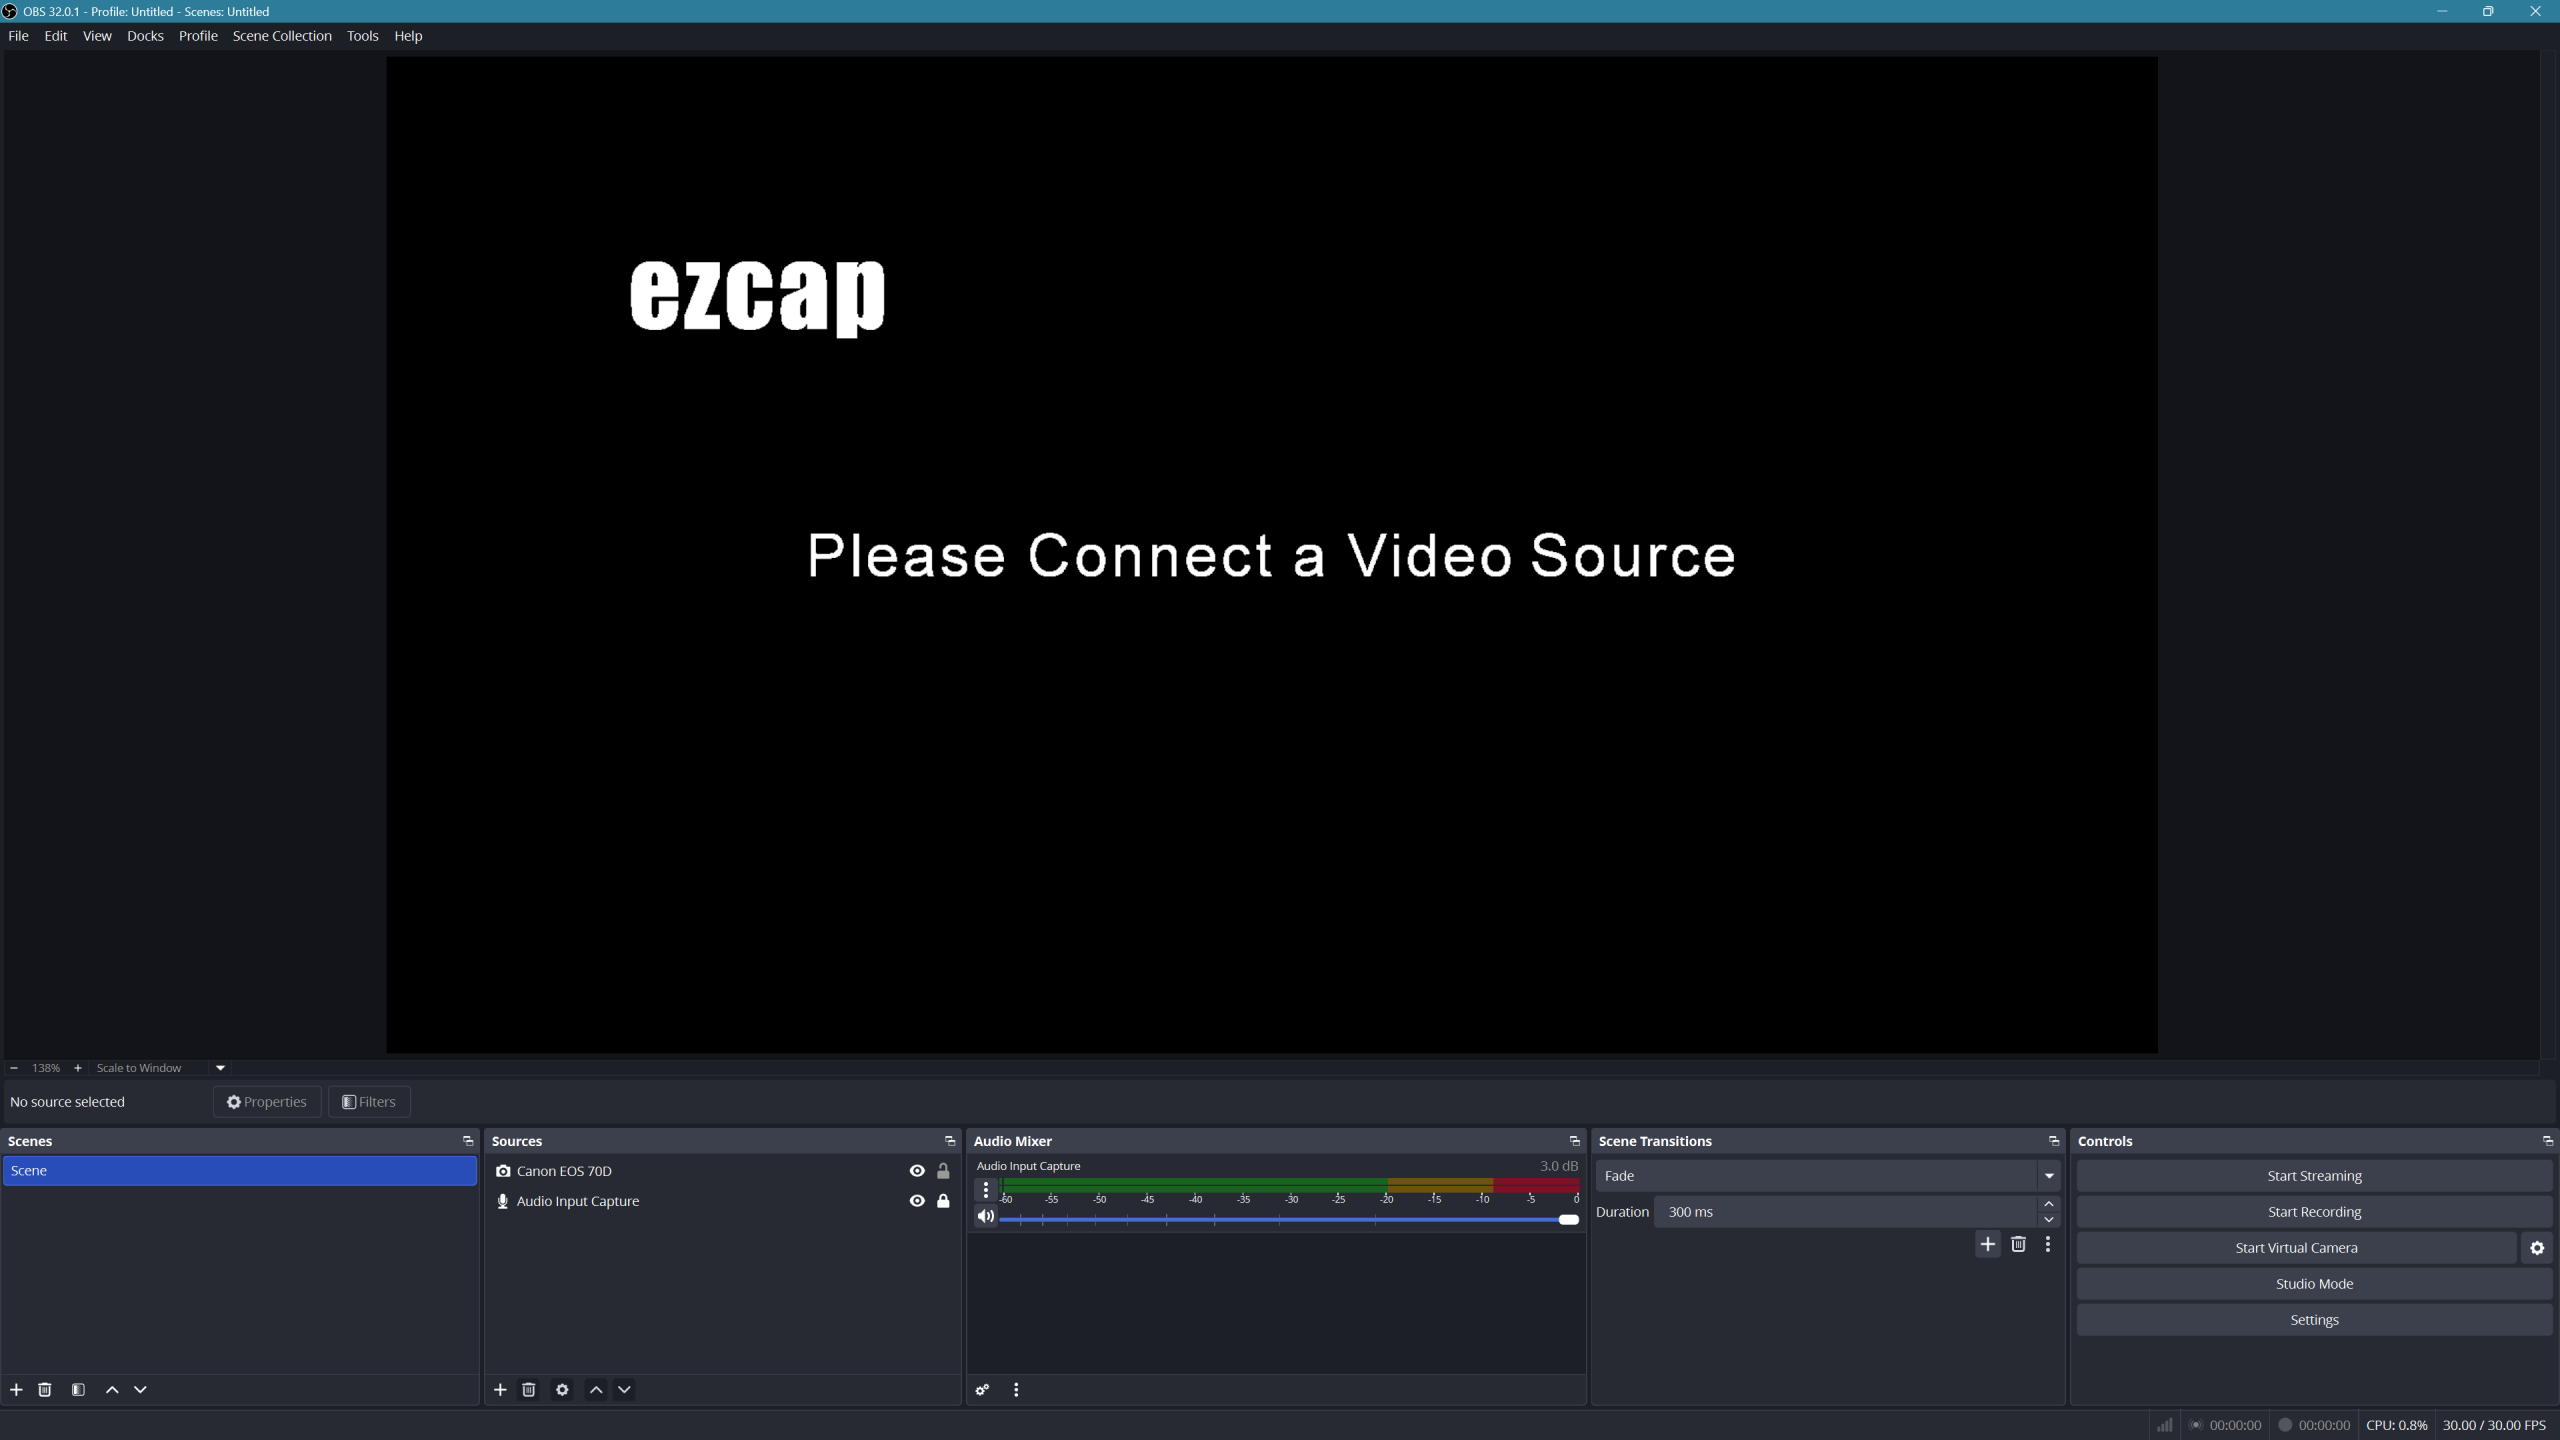
Pro tip: If your brand doesn’t have official software, third-party tools like OBS Studio (1) or SparkoCam (2) can bridge the gap.
Step 2: Connect Your Camera
- Plug your DSLR into your computer via USB.
- Some setups require an HDMI capture card (like Elgato Cam Link). This lets your computer see your camera as a standard video input.
Step 3: Power Up (and Stay Powered)
Web calls or livestreams drain batteries fast. Use a dummy battery (plugs into the wall) or an AC power adapter so you won’t cut out mid-session.
Step 4: Frame Your Shot
Mount your camera on a tripod or stable mount at eye level. Frame yourself with some space above your head and avoid looking up or down into the lens — confidence is all about angles.

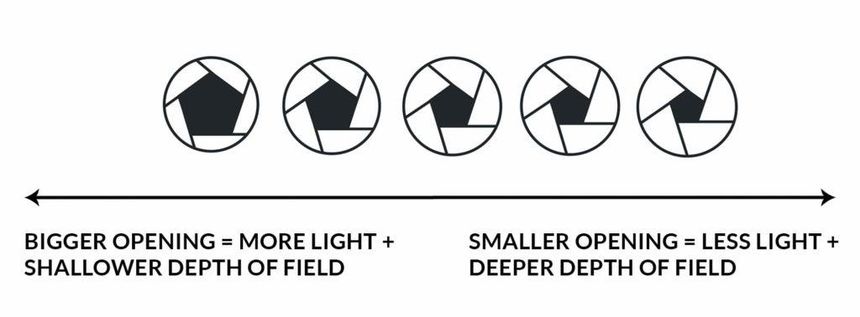
Step 5: Adjust Camera Settings
Aperture: Use a wide aperture (f/1.8–f/2.8) for a soft, blurred background.
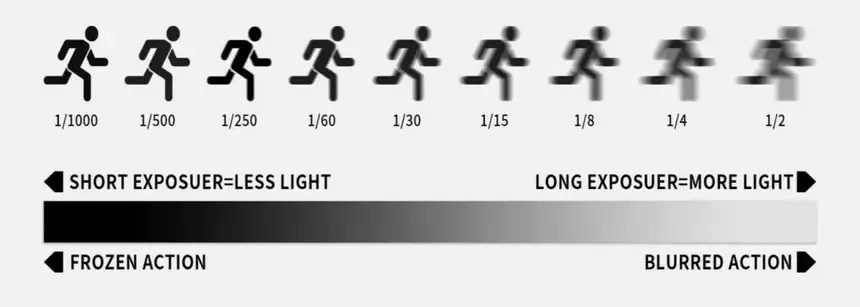
Shutter Speed: Set around 1/60–1/125 for natural motion.
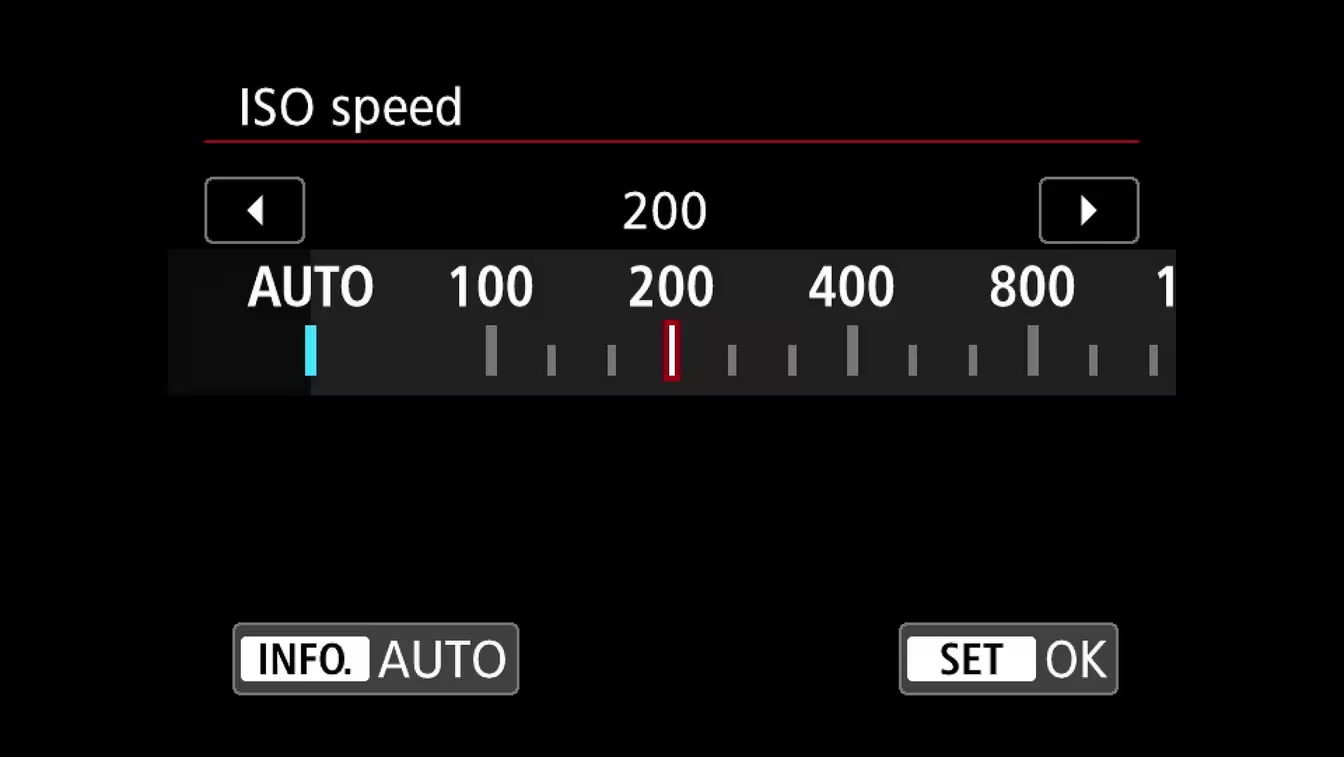
ISO: Keep it low for clean, noise-free video.
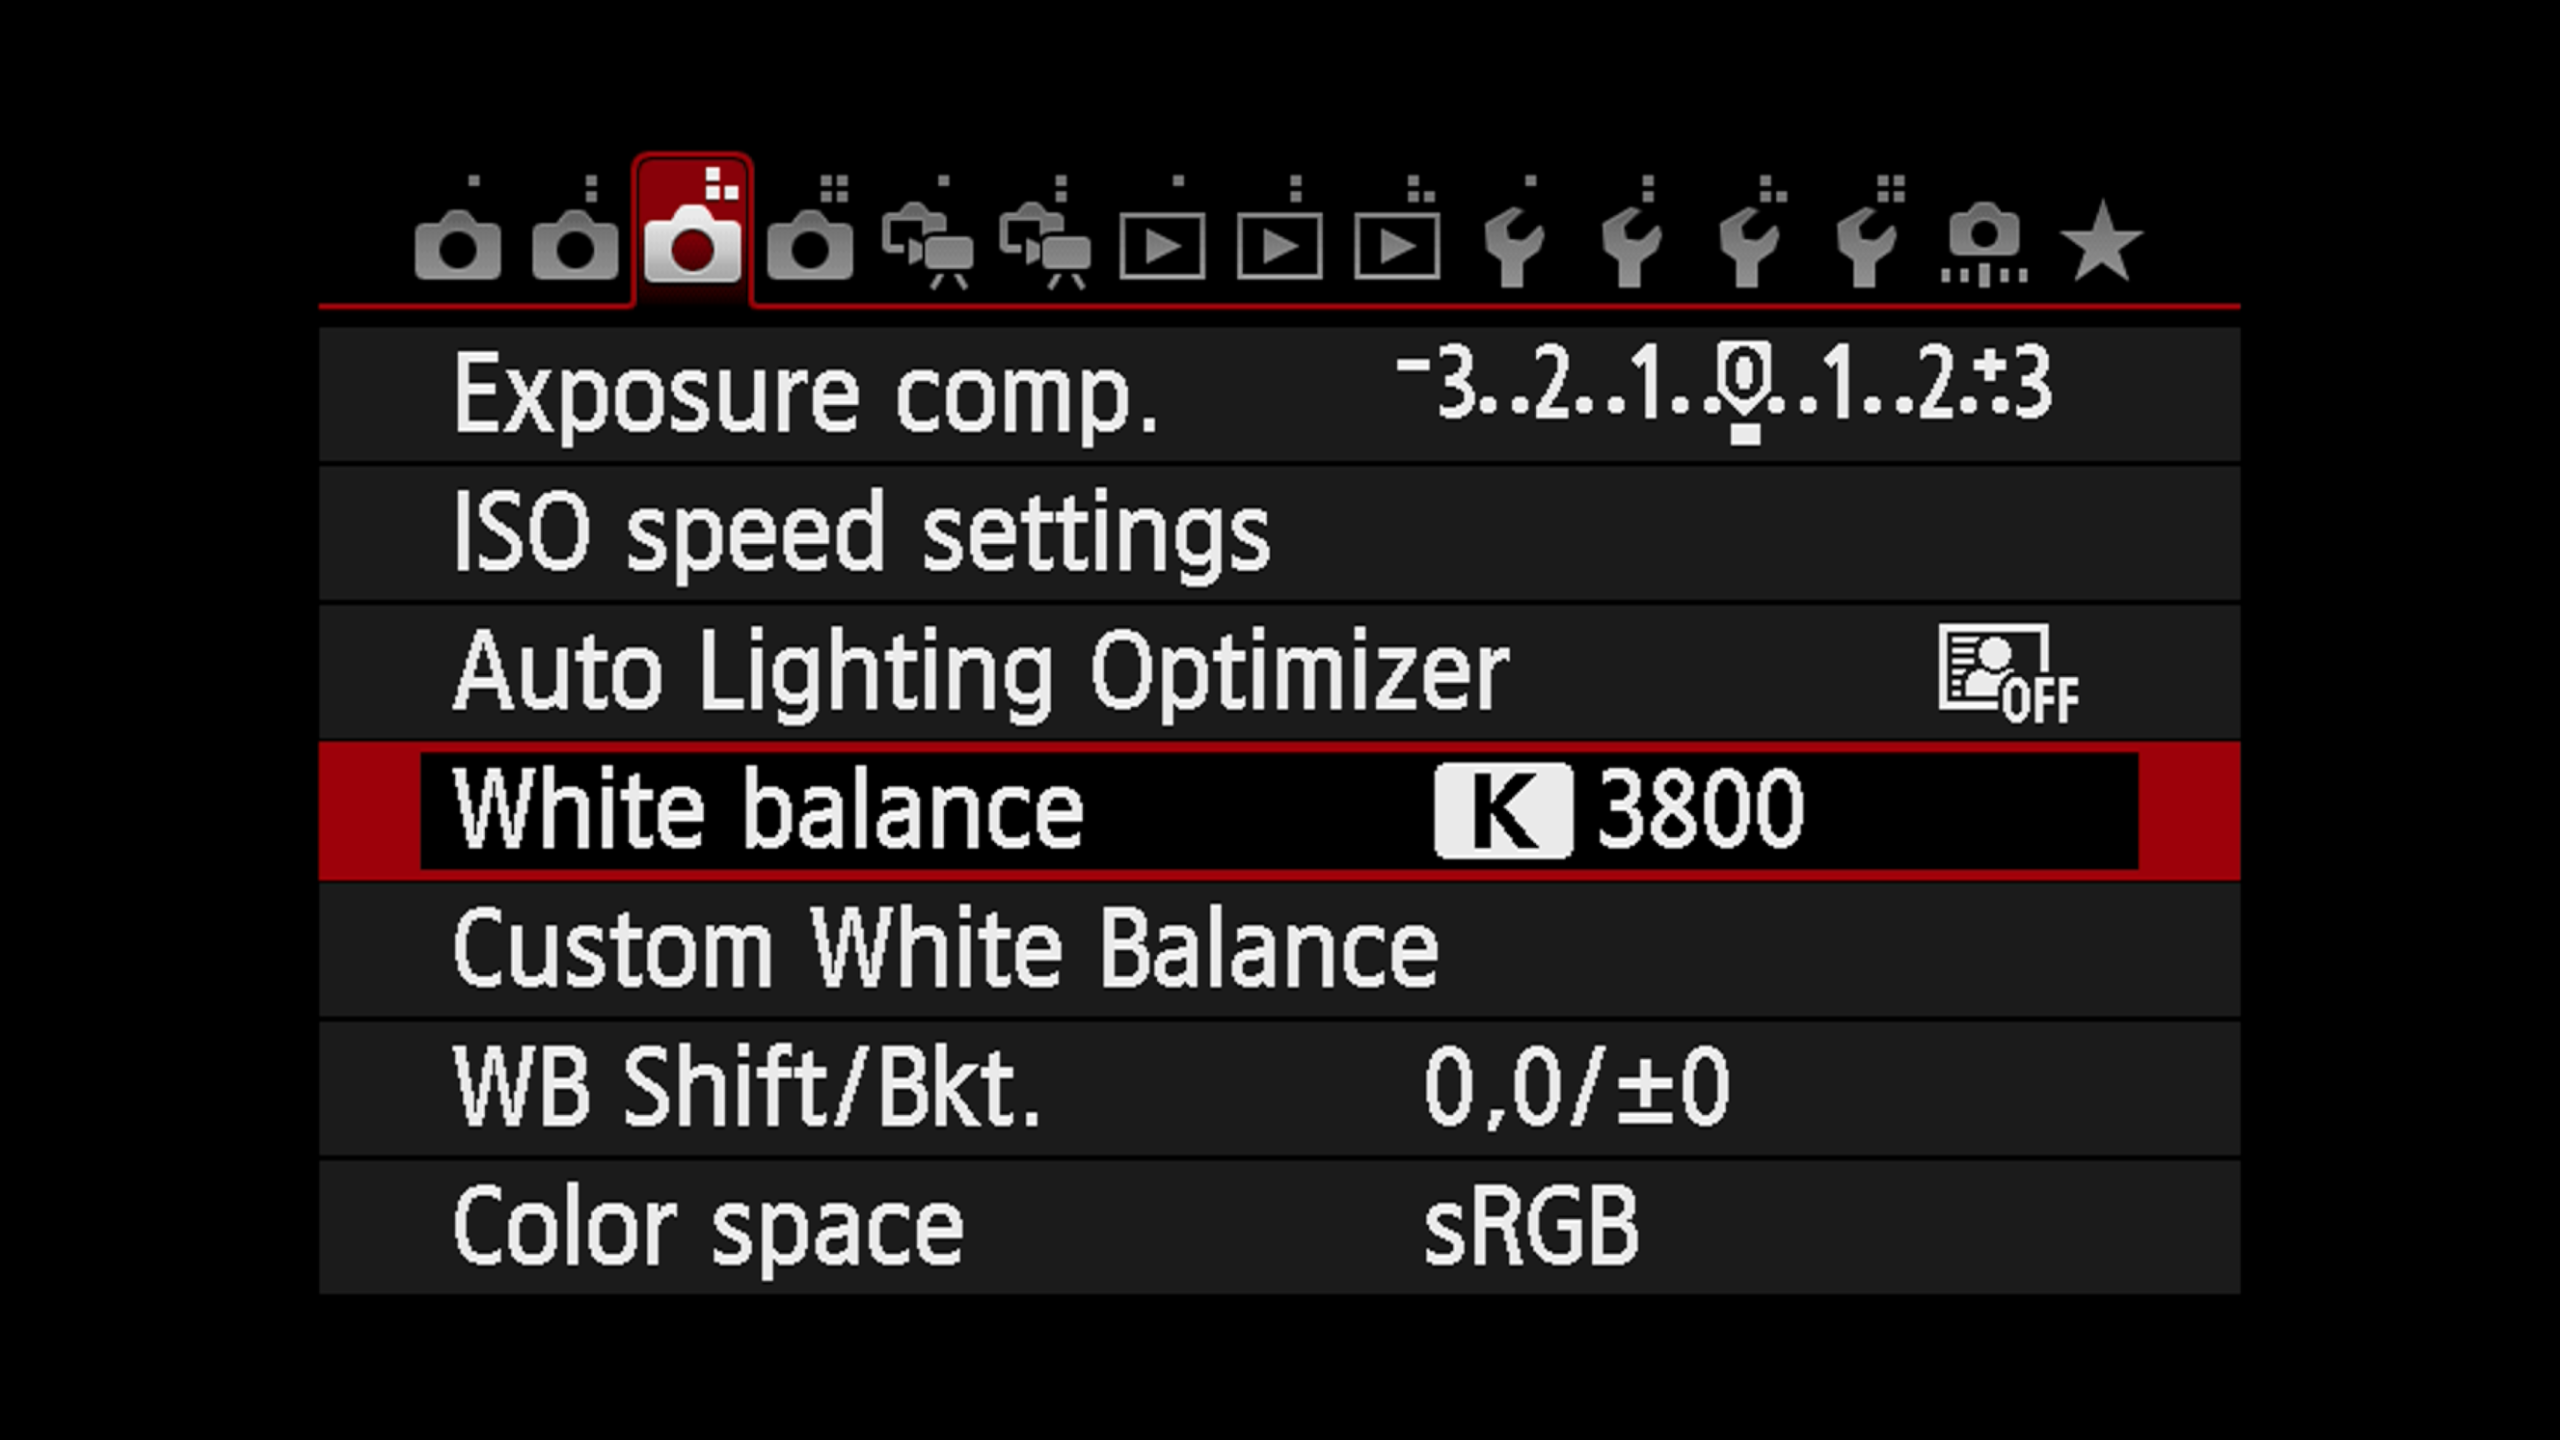
White Balance: Lock it so your colours stay consistent.
Step 6: Test in Your Video Platform
Open Zoom, Teams, OBS, or whichever platform you’re using. Select your DSLR (or capture card) as the video input. You should see your upgraded image instantly.
Bonus Tip: Lighting Matters
A DSLR will elevate your video, but good lighting seals the deal. Use natural window light or invest in a softbox or LED panel. Even the best camera can’t fix poor lighting.
Final Thoughts
Why settle for average when you can look extraordinary? Turning your DSLR into a webcam is a simple way to boost your online presence — whether you’re streaming, teaching, or leading meetings.
Once you experience the sharpness, depth, and confidence that comes with a DSLR setup, you’ll never go back to a grainy built-in webcam again.
And of course, if you ever need professional headshots, commercial photography or photo restoration, drop me a message at simon@fotosim.co.uk for a very competitive quote.
